This powerful tool allows you to generate all kind of icon images from a single source icon image. The new icon images are generally correctly created and their transparency is preserved (including the alpha channel for 32-bit icon images).
![]() To let GConvert generate icon images for you,
To let GConvert generate icon images for you,
- select the source image in the icon editor, generally it is recommended that you select the largest image with the highest color depth available (for example 128x128 24-bit if available).
- click the link named "Generate other images" and the following window will appear:
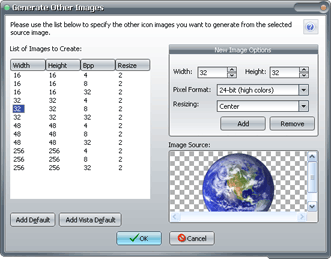
On the left you can see the list of the new icon images you want to create. When the window is opened, this list is blank: you have to populate it with new icon image specifications. There are four columns listing width, height, Bpp a.k.a. pixel format (in number of bits from 1 bit to 32 bits) and finally resizing method (from 0 to 2; see the resizing methods below) for all future icon images.
On the right you can see a box called "New Image Options": this box lets you add or remove icon images to the previous list.
To add a new icon image to be generated
- Enter the width and the height (in pixels) you want to attribute to the new icon image.
- Select the pixel format for the new icon image (in other words the color depth from monochrome to 16.8M with alpha channel).
Resizing: defines the method to resize the picture when the source image's size is not equal to the future icon image's size:
0 - Center: the source icon image will be centered in the new icon image.
1 - Crop: the source icon image is placed at the top-left corner of the new icon image.
2 - Fit to area: the source icon image is resized to exactly fit the size of the new icon image. Note that GConvert uses internal resample image filter to achieve better results.
If the source icon image is smaller than the new icon image (and when not resized), the remaining parts will be replaced with the transparent color (so they will look transparent in the final icon result). The transparent color used in this case is the background color defined in GConvert (using the Set Background Color command).
![]() Once all of the four settings are completed, press Add to add the new icon image specifications to the list.
Once all of the four settings are completed, press Add to add the new icon image specifications to the list.
![]() To remove an existing icon image from the list, just highlight it and press Remove.
To remove an existing icon image from the list, just highlight it and press Remove.
![]() Finally GConvert can already add some pre-defined icon images to the list: just click "Add Default" and the list will be filled with default sizes. You can of course then remove some of the new icon images or even add your custom ones. Furthermore "Add Vista Default" plays the same role except that it adds standard icon image formats required by Windows Vista (including 256x256 icon images).
Finally GConvert can already add some pre-defined icon images to the list: just click "Add Default" and the list will be filled with default sizes. You can of course then remove some of the new icon images or even add your custom ones. Furthermore "Add Vista Default" plays the same role except that it adds standard icon image formats required by Windows Vista (including 256x256 icon images).
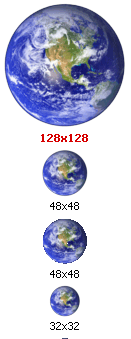
![]() When OK is pressed, GConvert will generate all images and update the icon in the icon editor:
When OK is pressed, GConvert will generate all images and update the icon in the icon editor:
Notes:
- At least one new icon image should be specified in order to press OK.
- GConvert will remember the last entered parameters for the next time you open the window.
- Color conversion parameters are taken from the Environment Options.
![]()