Welcome to GConvert
Full-featured icon toolkit for Windows
Everyone who likes icons should use GConvert: with this icon software, you can extract, view, create, edit, manage & convert icons without special knowledge.
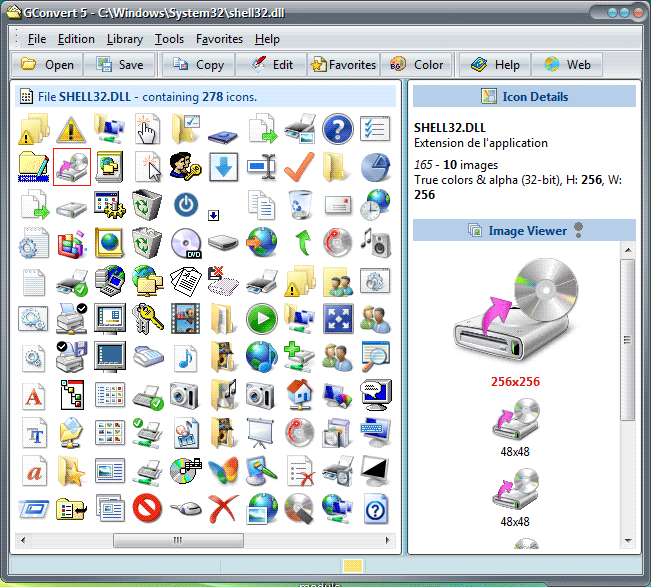
One of the best icon managers
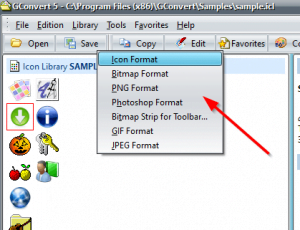
GConvert reads all icon images from any icon resources and displays them in a list: you select the icon you want and it can be converted to the format of your choice: icon, bitmap, PNG, Adobe™ Photoshop™ PSD, JPG, GIF… or you can copy it to the Windows clipboard – or even drag & drop it – for direct use into your applications, documents, Web pages…
Any icon resource is supported such as EXE, DLL, icon libraries ICL (32-bit and 16-bit), Windows™ ICO and Macintosh™ ICNS and RSRC files, cursors CUR, ZIP archives…
Extract, create, convert, save icons
GConvert is not only an icon editor (create icon from any image) but also an icon manager and collector: it can create/open/save icon libraries (ICL, DLL, ZIP), browse for icons on your computer, manage icon favorites, create bitmap strips for toolbars and much more.
With its intuitive interface, GConvert can be easily and quickly used without any problems: no complicate menus, buttons or dialogs. Each important command can be instantly accessed with the mouse or keystrokes.
A bunch of options for icons
GConvert offers you more flexibility and functionality than other standard icon extractors: its powerful but easy-to-use features let you do almost everything you want with your icons:
Extract any icon including all of its images (any size and color depth) from any files containing icons, including Windows Vista and Mac OS X 256×256 & 512×512 icons.
Convert icons to images in different formats: single icon ICO files, bitmaps BMP, Portable Network Graphic PNG, Photoshop PSD, JPEG, GIF, CUR…
Full transparency support (bit transparency or partial with alpha channel) in PNG, PSD, GIF and BMP.
Includes a powerful icon editor which lets you manage the images of your icons.
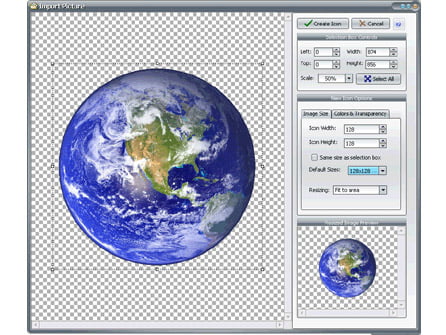
Create icons for Windows (ICO files) and Linux (PNG files). Only import one picture and all other icon images can be created in some clicks.
Create and manage icon libraries in ICL files (ICon Library in 16-bit and 32-bit formats), Zip archives. Compile icons into 32-bit DLL files similar to MORICONS.DLL fully recognized by Windows.
Useful drag/drop support: you can drag icons from GConvert and drop them directly onto compatible applications like Windows Explorer, image and word processing tools…
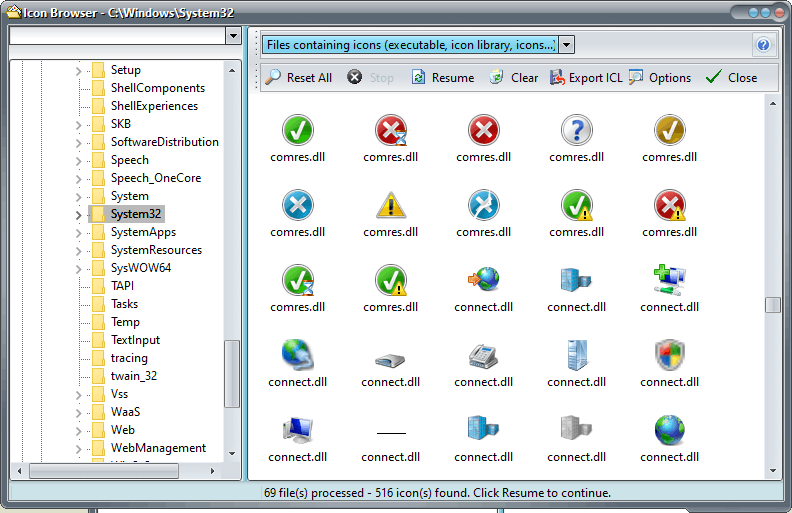
Search for hidden icons on your computer. Store these icons into icon libraries. GConvert recognizes Macintosh icons stored in ICNS and Macintosh resource fork files, including Mac OS X image formats from 128×128 (thumbnail) to 512×512 (Mac OS X Leopard).
Manage your icon favorites and your favorite icon directories. Access to your favorite folders directly from the Open dialog box. Create cursors for Windows (.cur) directly from icons and set their hotsport. Modify icons in .exe and .dll files (32-bit).
Customize GConvert according to your needs thanks to its versatile options and real skin support fully compatible with all Windows versions.

All Features in GConvert
Open icon files and convert any icon inside them!
- Extracts any icon including all of its images from any files containing icons. Then just select an icon in the main list in order to view all of its images in the Image Viewer instantly.
- Supports any icon size and color depth, including 32-bit
XP icons with alpha channels introduced with Windows™ XP and Macintosh™ OS X. - Create, open, modify and save icons for Windows Vista,
icons with 256×256 icon images (and optional PNG compression). - In addition to the full integration of the Windows icon format (.ico files), GConvert also recognizes Macintosh icons from 16×16 to OS X 128×128 (thumbnail), 256×256 (Mac OS X Tiger) & 512×512 formats – from 1-bit to 32-bit with alpha channel) stored in .ICNS and Macintosh resource fork files (.RSRC). You can then export, edit, convert these icons or even add them to icon libraries.
- Enhanced support for the handy 32-bit icon format for Windows® XP with full alpha blending (it means partial transparency). GConvert draws XP icons correctly (even if you do not work under XP!), saves them as they would appear under XP and can also keep the alpha channel when converting icons to PNG, PSD files & 32-bit
BMP files. - Exports selected icons to single icon ICO files, bitmaps BMP, Adobe Photoshop™ PSD, PNG, GIF, JPEG files and other additional formats thanks to external plug-ins…
- Special enhanced support for importing/exporting PNG files compatible with all standard graphic tools and Linux. Alpha channel of 32-bit icons can be embedded into PNG files when exporting and vice-versa. You can also create smaller 8-bit PNG files useful for web pages.
- Import/Export Windows cursor files (.cur) from monochrome to 32-bit cursors with alpha channel. You can also work with AniTuner especially designed for animated cursors.
- Drag and drop any file onto GConvert to view its icons, or if it’s an image file, to convert it into an icon.
- Powerful drag/drop support: you can drag icons from GConvert (or images already converted in the format of your choice) and drop them onto compatible applications (drag/drop aware) like Windows Explorer, image and word processing tools, etc.
- modify existing icons in EXE/DLL files.
Manage your collections of icons!
- create, open, edit and manage icon libraries in ICL format (standard icon library format) both in 32-bit or 16-bit. Add, rename, edit or remove icons from your icon libraries directly with GConvert. You can also compile them into true 32-bit DLL files (like MORICONS.DLL) or Zip archives.
- search for hidden icons on your computer and displays them in a list; you can also export the search results to icon libraries.
- reads icons directly from Zip archives so if you download icon archives from the Internet, you do not need to unzip your icons first in order to use them. Zip archives may also be turned into ICL libraries.
- display icon properties, color palettes and associated images (including mask, alpha channel bitmaps that you can copy to the clipboard).
- provides you with batch options: you can save or
convert several selected icons in one click (with optional image filtering). - exports icons to a folder or a Web page (with full PNG conversion).
- manage your icon favorites (including categories) and your favorite icon directories. GConvert can remember the folders where you open/save/convert icons.
Create and edit icons yourself!
- includes a powerful icon editor which lets you add, edit, remove, resize and generate images for your icons. Note that this editor is not like traditional icon editors: it does not provide standard tools like selection, pen, brush… On the contrary use your favorite imaging tool without having to learn a new image editor again, and then import changes directly into the GConvert icon editor.
- Create new icons by importing image files and turn them into icon images of any format (from monochrome to 32-bit icons with alpha channel). Images may be resized, centered or cropped.
- Enhanced color support in GConvert 5: the program takes account of image color palettes if they are available.
- Turn 32-bit icon images (with alpha channel) into non 32-bit images (useful for GIF images).
- Special support for PNG and PSD files: easily convert your PNG and PSD into icons (and even with partial transparency thanks to alpha channels).
An intuitive easy-to-use interface!
- the majority of operations are accessible via keystrokes, context menus or tool buttons, and your tasks can be achieved in simple clicks: no complicate menus or
commands. - change the default appearance of the interface: GConvert supports skins! You can grab some additional skins here in addition to the ones shipped with the original package.
- remembers last opened files, folders where you opened/saved icon files, and store your favorite paths and icon files!
- directly open icon files from Windows Explorer thanks to the optional context menu added by GConvert.
- customize GConvert thanks to its versatile options.
- comes with an extensive context-sensitive help file describing all steps and functions in GConvert. Just press F1 to get help!
- includes a sample icon library, skins, a F.A.Q. page and a “How To” list…
- and much more.