
How to convert a PNG image to an ICO icon with GConvert?
In This Article
A Windows icon is not just a small picture saved under another extension. It is a bitmapped image combined with a mask or an alpha channel that makes parts of it transparent, and one .ico file can hold several such images, each with its own size and color depth. Converting a PNG to ICO therefore means building that set of images from your picture. GConvert, an icon toolkit for Windows, does it with its Convert Picture To Icon command and reads PNG files natively.
GConvert runs on Windows 11, 10, 8, 7, Vista and XP, and on older versions such as 2000, ME and 98.
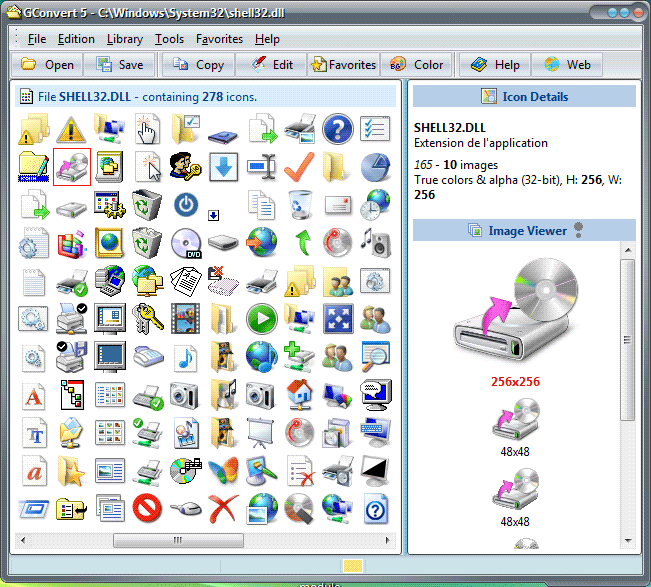
Convert the PNG to an icon
Section titled “Convert the PNG to an icon”-
Choose File | Convert Picture To Icon (Ctrl+T) and select your PNG file. Dropping the file onto the GConvert window does the same.
-
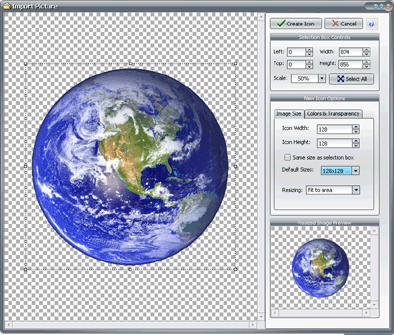
The Import Picture window shows your image with a rectangle around the part that becomes the icon image. GConvert selects the whole picture by default. To use only a region, move or resize the rectangle, or type its coordinates.
-
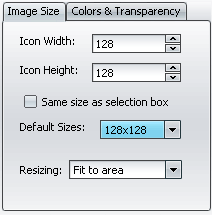
On the Image Size tab, enter the width and height of the icon image, or pick one from the Default Sizes list. If the selection does not match that size, choose Center, Crop (top-left corner) or Fit to area (the selection is resized).
-
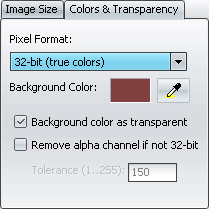
On the Colors & Transparency tab, choose the pixel format. The documentation suggests 32-bit or 24-bit for imported pictures. A 32-bit icon image has an alpha channel, so a PNG that carries one can keep its partial transparency. You can also pick a background color that becomes transparent in the icon. A preview shows the result.
-
Click Create Icon. The icon editor opens with the new image.
-
Add the other sizes, as described below.
-
Click Export icon file, enter a file name and confirm. Open the new file in GConvert to check it.
Sizes and color depths
Section titled “Sizes and color depths”Different parts of Windows use different icon sizes, and Windows selects the image that suits the screen. The what is an icon page gives these examples:
- 16x16 for the taskbar and the quick launch bar;
- 24x24 for the Start menu;
- 32x32 for the desktop of Windows 9x;
- 48x48, found especially in Windows 2000 and XP icons;
- 256x256 for Windows Vista icons.
An icon needs at least one image, usually 32x32. Each image has a color depth: 1-bit (2 colors), 4-bit (16), 8-bit (256), 24-bit (16.8 million), or 32-bit, which adds an 8-bit alpha channel to 24-bit color. Windows XP introduced the 32-bit format.
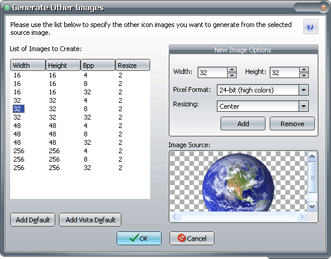
To create the missing sizes, select your image in the icon editor and click Generate other images. Add Default fills the list with default sizes, and Add Vista Default adds the formats Windows Vista needs, 256x256 included. You can also add your own width, height and pixel format. The create different icon sizes page recommends starting from a large source image with a high color depth.

Save the icon as ICO
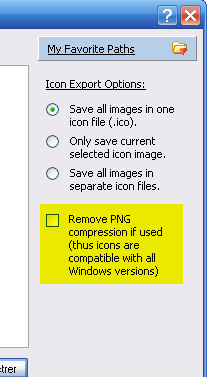
Section titled “Save the icon as ICO”The icon editor's Export icon file link writes the .ico file. To save an icon that is already open in GConvert, select it, click Save and choose the icon format. You can then save all images in one file, which the documentation generally recommends, only the selected image, or every image in its own file. The save icons page also covers BMP, PNG and PSD output.
What else GConvert does
Section titled “What else GConvert does”GConvert also extracts icons from files such as EXE, DLL, ICL, OCX, CPL, SCR, CUR, ICNS and ZIP, manages ICL icon libraries, compiles them into DLL files, replaces the icon inside an EXE or DLL file, and makes favicon.ico files and Windows cursors. The introduction lists everything.