
How to create an animated cursor with AniTuner?
In This Article
An animated cursor is a mouse pointer that plays a short animation. Windows stores it in an .ani file, and AniTuner is the program that creates, edits and converts such files. This article follows a first cursor from a blank project to a pointer installed in Windows.
AniTuner is freeware. Its license lets you install, use and distribute it at no charge, commercial use included, and the program shows no advertising.
What an .ani file is
Section titled “What an .ani file is”An .ani file uses the Microsoft RIFF structure. It holds information about the animation, such as the author, the title, and the length and order of each step, followed by the frames, which are stored in the icon format (animated cursors). Each frame stays on screen for a short time, the frame timing, counted in jiffies. One jiffy is 1/60th of a second.
Start a new cursor
Section titled “Start a new cursor”Get AniTuner from the download page, as an installer or as a portable edition that needs no installation. On the Welcome page, choose Create a new animated cursor. AniTuner starts a blank cursor with default parameters and one blank frame, and the Properties page lets you set the size, the number of colors, the title and the author. The title and author are optional, but the documentation recommends filling them in.
Add frames
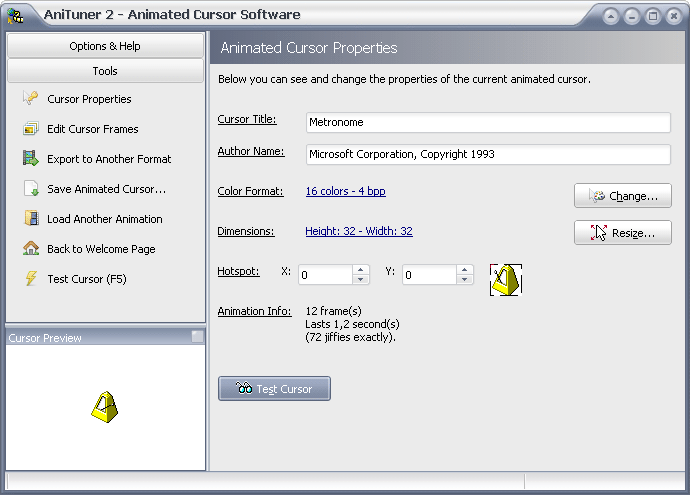
Section titled “Add frames”AniTuner has no image editor of its own, so frames come from existing images. Choose Edit Cursor Frames in the Tools panel.
-
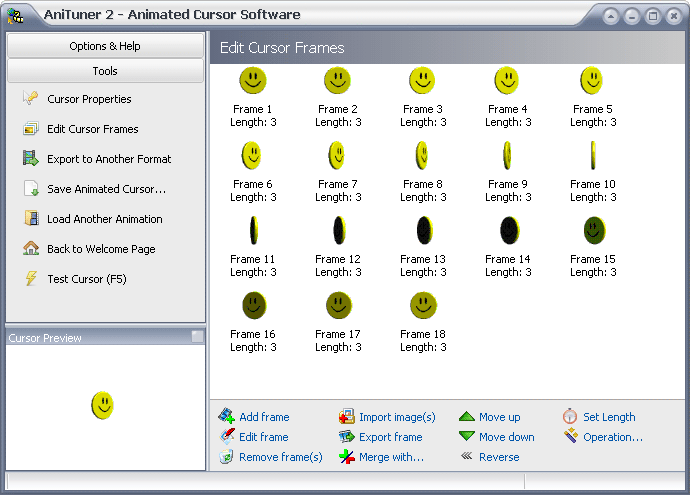
Click Import image(s) and select a file. AniTuner reads BMP, JPEG, PNG (with its alpha channel), GIF (static or animated), Photoshop PSD, CUR, ICO, ANI and AVI files. If the file holds several images, View Frame picks the one to import.
-
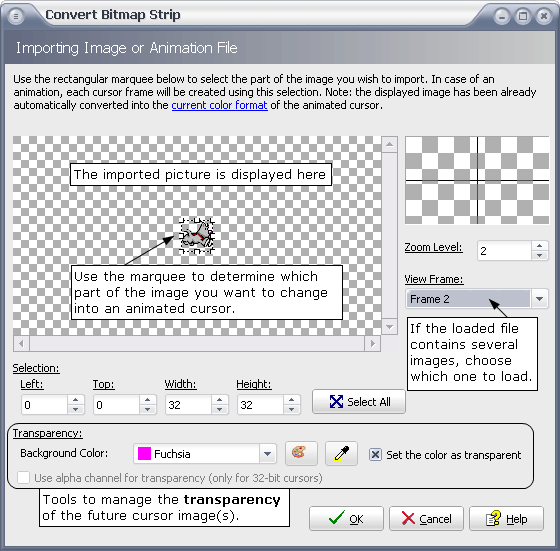
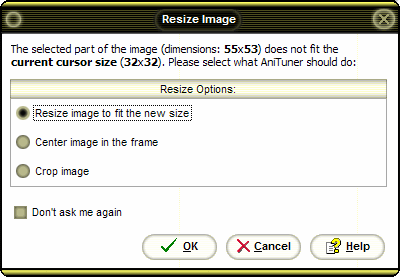
Mark the part of the image to use with the selection rectangle. If it does not match the cursor size, choose to resize, center or crop the image.
-
Choose the transparent color. AniTuner proposes a background color for formats that support transparency, and the dropper tool picks another one from a pixel you click.
-
Confirm. AniTuner converts the colors to the cursor's color depth and creates the frame. Repeat for each frame.
The links on the same page also add blank frames, copy a frame several times, paste a frame from the clipboard, reverse the order and move frames up or down. You can drag a frame to a new position as well.
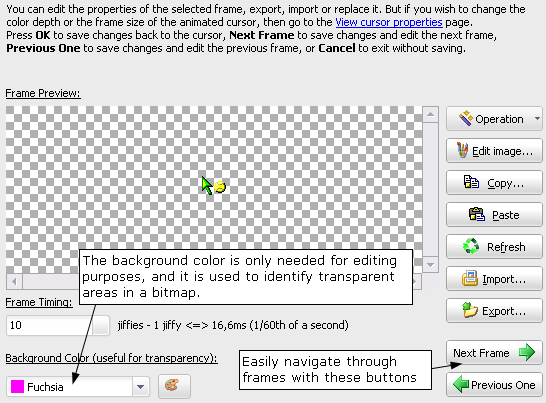
To change a frame, double-click it. The frame editor offers flips, rotations and Merge with Image, which draws an external image onto the frame. The Edit Image button sends the frame to the image editor you set in the Program Options. For a 32-bit cursor, use an editor that keeps the alpha channel, which Microsoft Paint does not.
Set the timing
Section titled “Set the timing”In the frame list, Set Length changes the duration, in jiffies, of the selected frames, or of all frames when none is selected. The frame editor has a timing field for a single frame, and the value must be 1 or more. See editing cursor frames.
Set the hot spot and test
Section titled “Set the hot spot and test”The hot spot is the pixel Windows uses as the position of the pointer, such as the tip of an arrow or the middle of a crosshair. Open Cursor properties, where AniTuner draws a small red cross on the first frame, and click the image to move the hot spot.
Press Test Cursor or F5 to replace your mouse pointer with the new cursor for 30 seconds. Press it again to return to the normal arrow (cursor properties).
Save and install the cursor
Section titled “Save and install the cursor”-
Click Save Animated Cursor in the Tools panel and choose a file name.
-
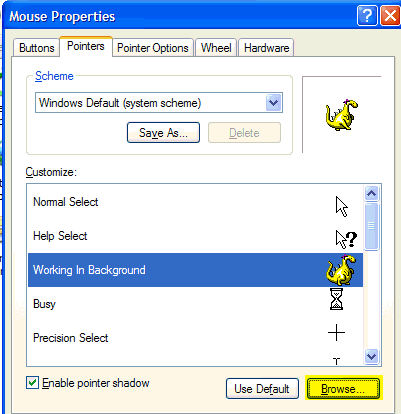
Open the mouse settings in the Windows Control Panel and select the Pointers tab.
-
Highlight the pointer to replace, click Browse and select your .ani file.
The saving and testing page also explains how to use an .ani file on a web page.