
How to protect an Excel workbook?
In This Article
How far a workbook must be protected depends on who receives it. Inside a team, Excel's own tools prevent accidents: locked cells, a fixed sheet structure, a locked VBA project and a password to open the file. For a workbook you sell or hand to people outside your control, the formulas and the code have to leave the file, because Excel's passwords prevent edits and not copying. This article gives the steps for both situations.
Part 1: with Excel alone
Section titled “Part 1: with Excel alone”1. Lock the cells that must not change
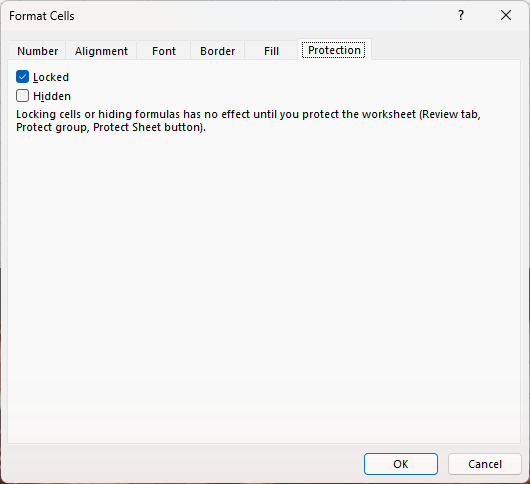
Section titled “1. Lock the cells that must not change”By default every cell is locked, but the lock only takes effect once the sheet is protected. First unlock the cells users may fill in: select them, open Format Cells (Ctrl+1), and on the Protection tab clear Locked. For cells whose formula should not appear in the formula bar, tick Hidden on the same tab.
Then click Review > Protect Sheet, choose a password, and tick the actions users may still perform, such as formatting cells, sorting or using filters. Allow Users to Edit Ranges, on the same ribbon tab, opens specific ranges with their own password.
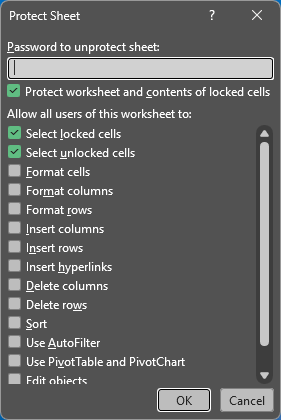
What it stops: changes to locked cells and the actions you did not allow. What it does not stop: reading, selecting and copying the values, and other spreadsheet applications may ignore the protection altogether.
2. Protect the structure
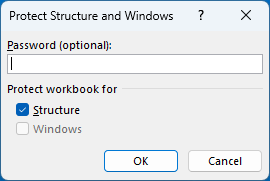
Section titled “2. Protect the structure”Review > Protect Workbook, with a password, prevents sheets from being added, deleted, moved, renamed, hidden or unhidden. It keeps a hidden sheet hidden, but not its values out of reach: a formula on another sheet can still read them, so it is not a protection of the contents.
3. Lock the VBA project
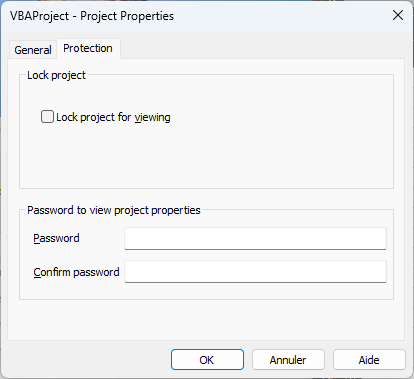
Section titled “3. Lock the VBA project”In the Visual Basic Editor (Alt+F11), open Tools > Project Properties, then the Protection tab, tick Lock project for viewing and set a password. Save and close the workbook: the lock applies from the next opening. Microsoft documents this as a way to keep the project from being viewed or edited; the code itself is not encrypted, and the lock is removed by free tools.
4. Encrypt the file
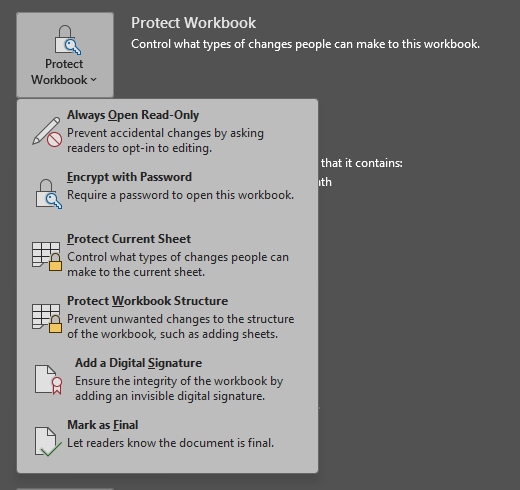
Section titled “4. Encrypt the file”File > Info > Protect Workbook > Encrypt with Password encrypts the file. Without the password, nobody opens it; with the password, everything in it is available. Keep the password somewhere safe: Microsoft cannot recover it.
5. Mark as Final
Section titled “5. Mark as Final”File > Info > Protect Workbook > Mark as Final makes the workbook read-only and shows a banner. It is a signal, not a lock: one click re-enables editing.
Part 2: for a workbook you distribute
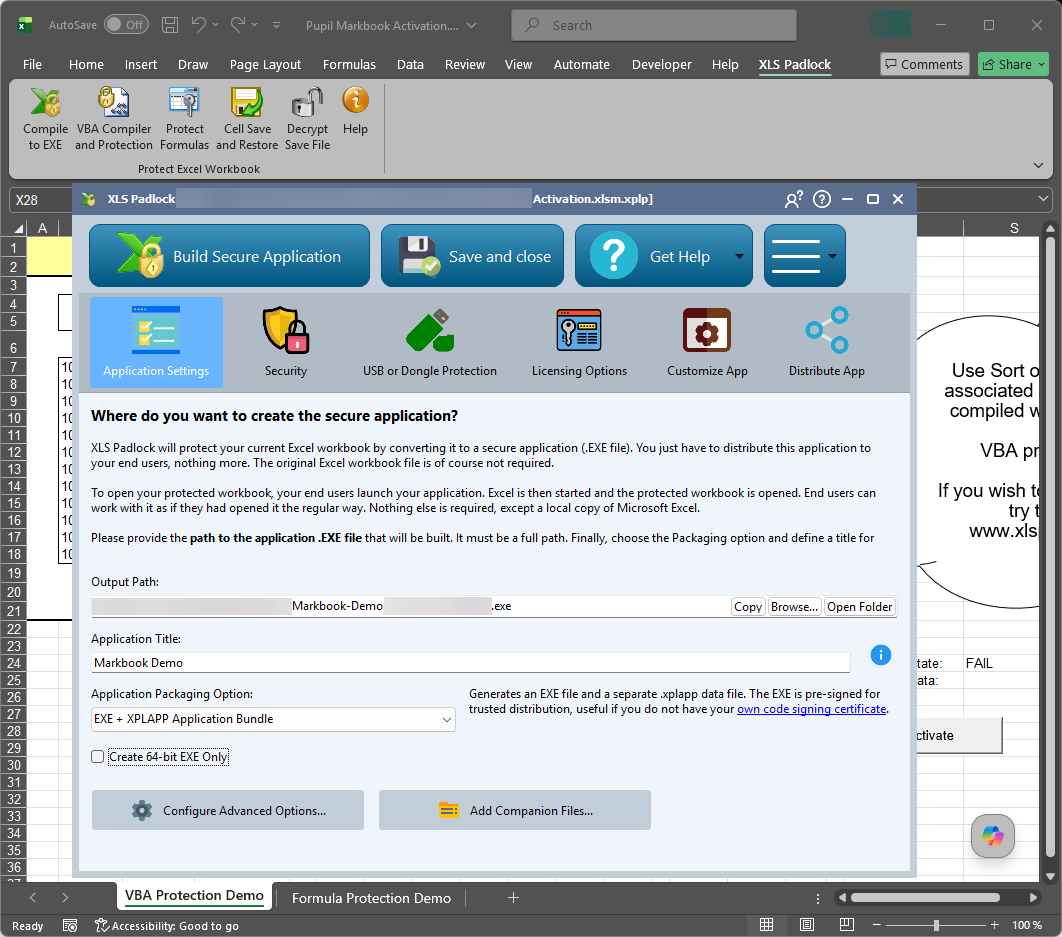
Section titled “Part 2: for a workbook you distribute”XLS Padlock compiles the workbook into a Windows EXE that the customer runs; the workbook opens in their own Microsoft Excel for Windows, 2010 or newer, 32-bit or 64-bit. The EXE holds the workbook in an encrypted container, so the customer never gets a plain XLSX or XLSM file on their disk. The steps below follow the pages of the tool, opened from its tab in the Excel ribbon.
1. Keep the original
Section titled “1. Keep the original”XLS Padlock reads your workbook and writes the EXE; the customer gets the EXE, you keep the workbook. Keep it in your own files, and protect that copy with the steps of Part 1 if several people work on it.
2. Choose the formulas to protect
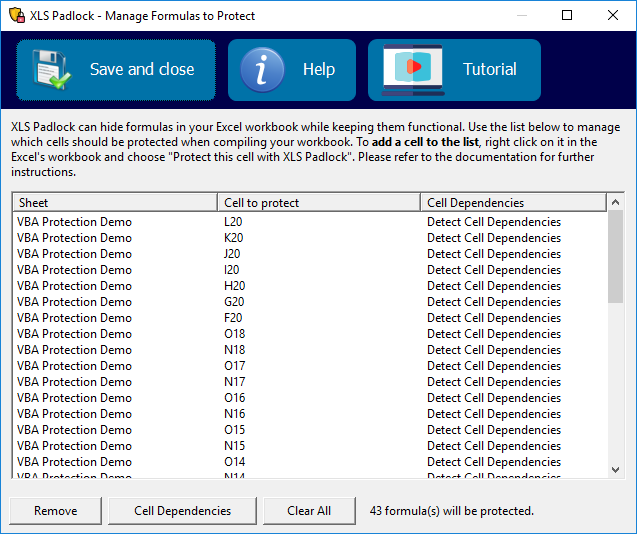
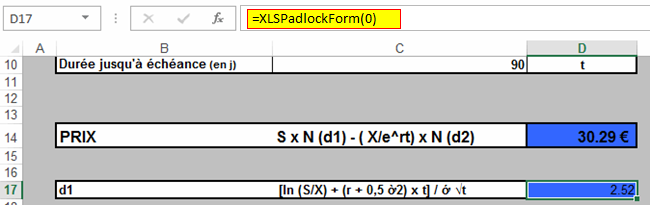
Section titled “2. Choose the formulas to protect”Select the cells whose formulas must stay secret. They keep calculating in the EXE, but the formula bar shows a protected call instead of the formula, and if someone removes the protection the cells stop working. Protect the key cells rather than every cell: the XLS Padlock FAQ recommends it for performance.
3. Choose the VBA to compile
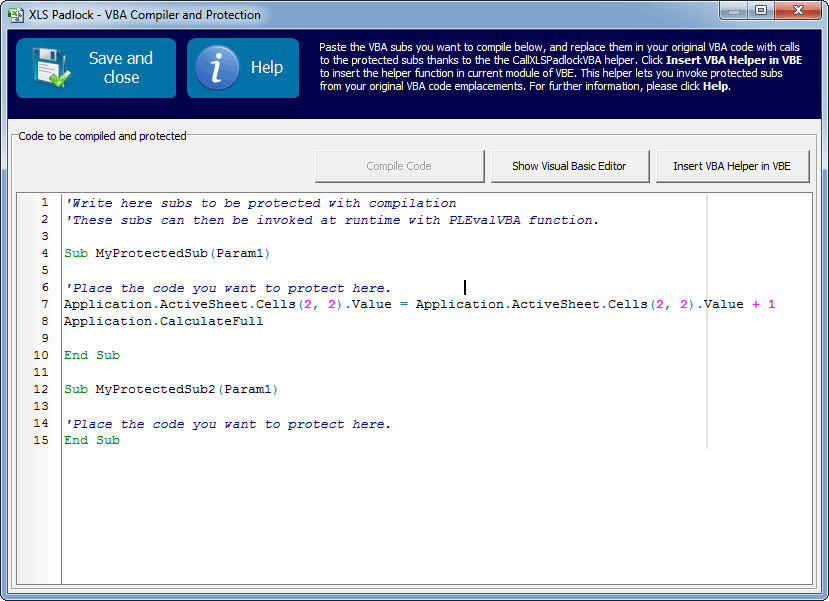
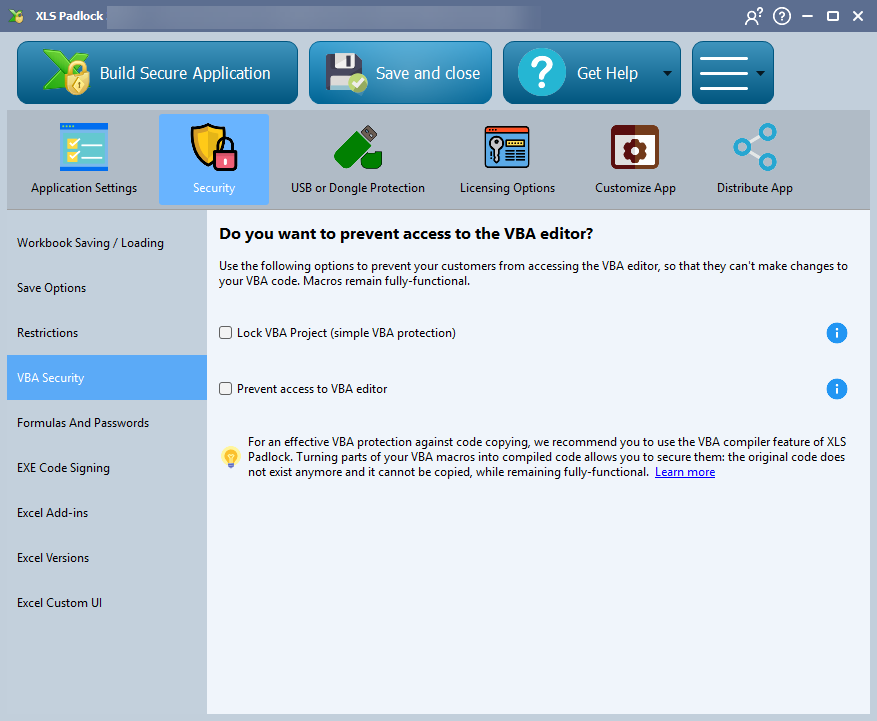
Section titled “3. Choose the VBA to compile”Select the subs and functions to compile into bytecode. Their source leaves the workbook, replaced by one-line calls. UserForm code and event handlers stay as VBA; on the VBA Security page, block access to the Visual Basic Editor so that they cannot be opened in the EXE.
4. Set what the customer may do
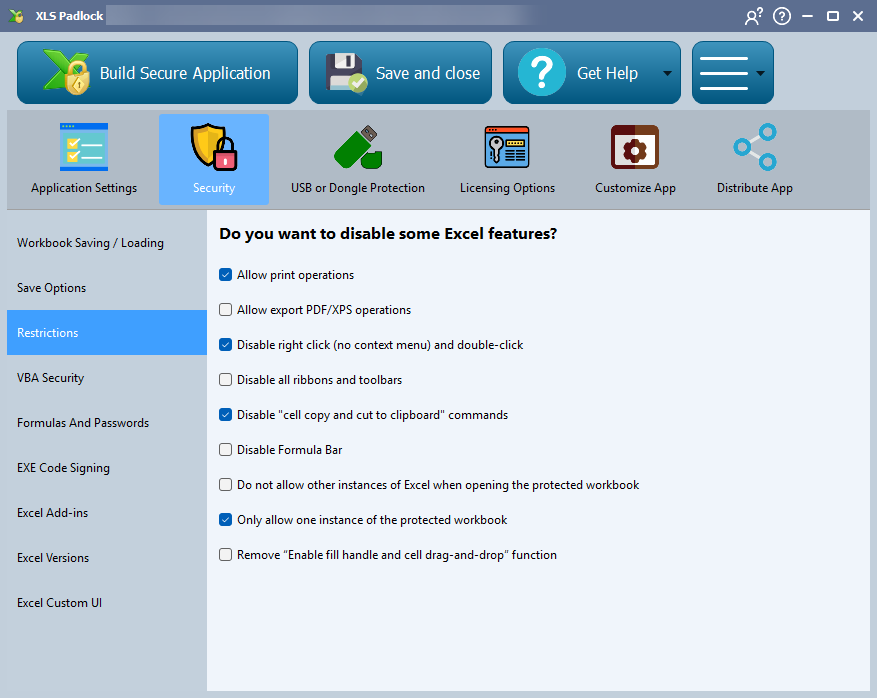
Section titled “4. Set what the customer may do”Decide, one by one, whether the EXE allows copying to the clipboard, printing, exporting to PDF, the formula bar and the right-click menu, and whether, and how, changes can be saved. Add an end-user licence agreement shown before the workbook opens if you want one.
5. Decide how copies are licensed
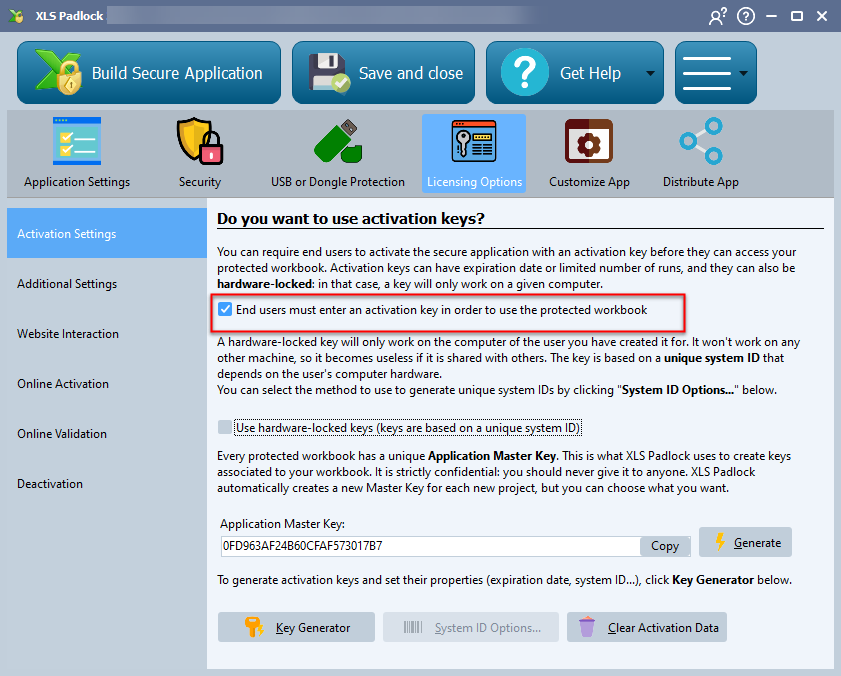
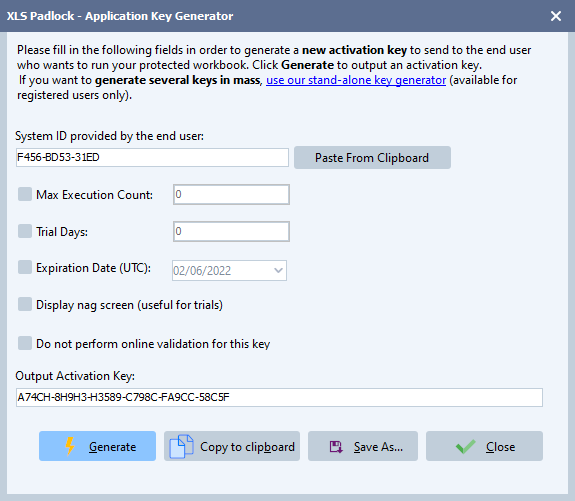
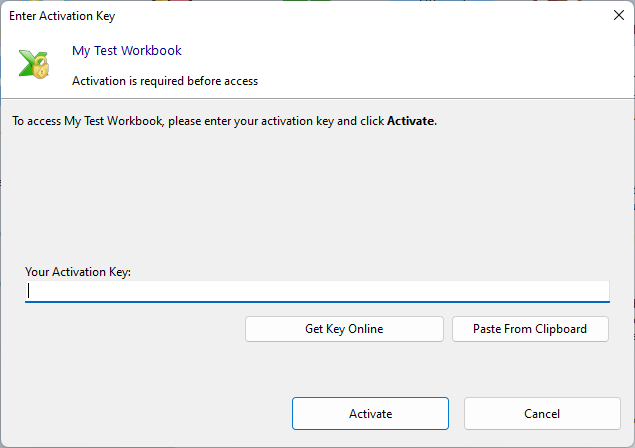
Section titled “5. Decide how copies are licensed”Choose between activation keys locked to one computer, online activation checked on a PHP server you host, a USB key or a dongle, and set an expiry by date, number of days or number of runs when the workbook is sold as a trial or a subscription. The built-in key generator makes the keys; a WooCommerce store or FastSpring can deliver them automatically.
6. Build and test
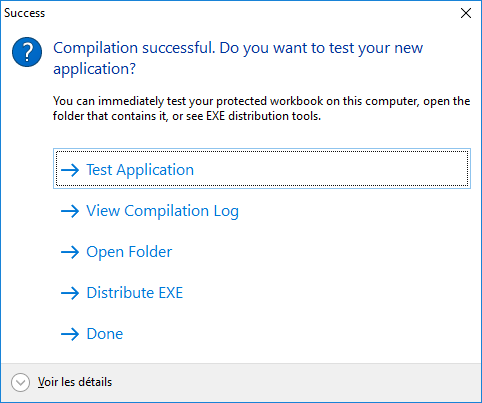
Section titled “6. Build and test”Build the EXE, then test it on a computer that is not yours, with the Excel version your customers use. Check that the protected cells calculate, that the compiled macros run, that the actions you disabled are disabled, and that a copied EXE asks for a key. Ship the EXE, optionally in a signed installer made with Paquet Builder.

Checklist
Section titled “Checklist”| Situation | Do this |
|---|---|
| Colleagues fill in a form and must not break it | Part 1, steps 1 and 2 |
| Macros should not be edited by colleagues | Part 1, step 3 |
| The file travels by e-mail or sits on a shared drive | Part 1, step 4 |
| The workbook is sold, or holds formulas and code you must keep | Part 2 |
| Only the macros must be protected, in Excel, Word, Access or PowerPoint | VBA Padlock |