Cost-Effective EXE Code Signing with Azure Trusted Signing #
Code signing is an essential process for software developers, ensuring that their applications are trusted by Windows and antivirus software. In fact, many of our software products generate EXE files and provide the ability to digitally sign them. To do so, traditionally, developers needed to purchase expensive code signing certificates (several hundreds of USD) and store them securely using USB tokens or hardware security modules (HSMs).

With Azure Trusted Signing, Microsoft offers a cloud-based alternative that simplifies the code signing process while reducing costs. This article explains why Azure Trusted Signing is a cost-effective and secure solution for signing EXE files, along with step-by-step instructions to set up an account.
Once your Trusted Signing account is set up, you can use it with our software tools, such as Paquet Builder, our Windows installer creator, or HTML Executable – our HTML to EXE compiler – to sign the generated EXE files
Why Choose Azure Trusted Signing Over Traditional Code Signing? #
✅ Cost-Effective Pricing Model #
- Traditional EV Code Signing Certificates can cost $400–$900 per year.
- Azure Trusted Signing offers a flexible, pay-as-you-go model, starting at $9.99 per month:

- No need for USB tokens or hardware security modules (HSM), reducing additional costs.
📖 More details on Azure pricing: 👉 Azure Trusted Signing Pricing
✅ No USB Token or Hardware Module Required #
- Traditional signing methods require an HSM or USB token for private key storage.
- With Azure Trusted Signing, the entire process is cloud-based, eliminating the risk of key loss or theft.
- Supports multi-factor authentication (MFA) for added security.
✅ Automated Certificate Management #
Azure Trusted Signing certificates have a short validity period, typically only 72 hours, to mitigate the risks associated with misuse or abuse of the certificates. Here are the key reasons:
📖 Learn more about certificate management: 👉 Azure Trusted Signing Certificate Management
✅ Easy Integration with Our Developer Tools #
- Works with Microsoft SignTool, Azure CLI, and CI/CD pipelines.
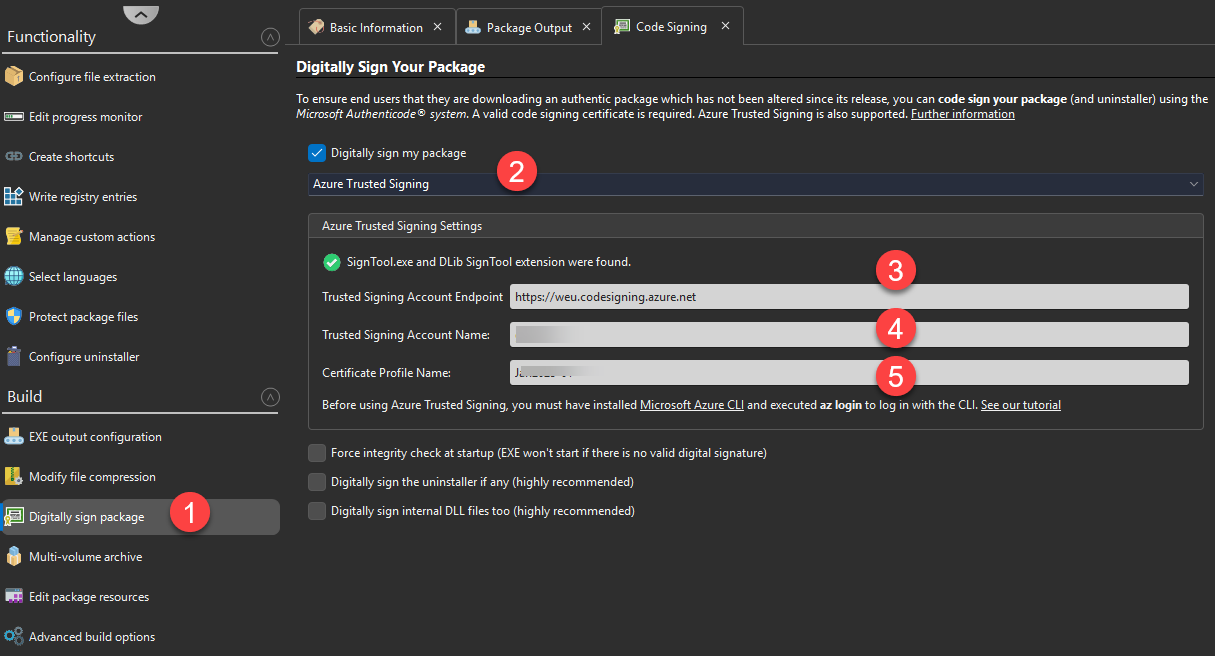
- Compatible with our installer Paquet Builder for seamless EXE code signing.
📖 Integration Guide: 👉 Paquet Builder With Azure Trusted Signing Integration
Are There Any Drawbacks? #
🔸 Internet Connection Required – Since this is a cloud-based solution, an internet connection is needed to sign code.
🔸 Identity Validation Process – Setting up a Trusted Signing account requires business verification, which can take some time. But obtaining a code signing certificate from a Certificate Authority also requires identity verification.
Why Do Azure Trusted Signing Certificates Only Last a Few Days? #
Unlike traditional code signing certificates, which are valid for one or more years, Azure Trusted Signing uses short-lived certificates that are valid for only a few days. This is a security measure designed to protect the integrity of the signing process. This approach offers several advantages. For instance, since the certificate is only valid for a short period, even if an attacker gains access, its usefulness is extremely limited.
Will My Signed EXE Files With An Azure Trusted Signing Certificate Expire? #
✅ No, signed EXE files will not expire!
Even though the certificate itself lasts only a few days, the digital signatures remain valid indefinitely because a secure timestamp is applied during signing.
When you sign your EXE files with Azure Trusted Signing, the system automatically attaches a timestamp from a trusted authority. This ensures that:
- The signature remains valid even after the original signing certificate expires.
- Threfore, Windows and security tools will continue to recognize the signature as long as the timestamp was valid at the time of signing.
👉So, are you convinced? If yes, see how to get started step by step below.
Step-by-Step Guide: Setting Up Azure Trusted Signing #
Step 1: Create an Azure Account #
If you don’t already have an Azure account, create one here:
👉 Microsoft Azure Sign-Up
Once signed in, create a new subscription (Pay-As-You-Go recommended).
Step 2: Create a Trusted Signing Account #
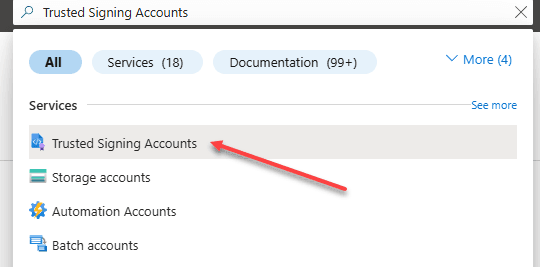
1️⃣ In the Azure Portal, search for “Trusted Signing Accounts”:
2️⃣ Then, click “Create”. After that,
- Enter an account name.
- Select your Azure subscription and resource group.
- Choose your region and pricing tier.
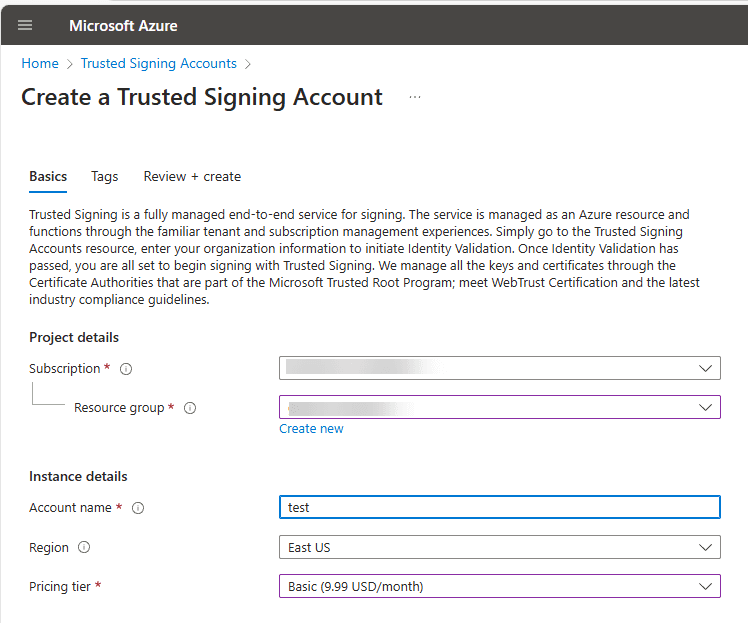
3️⃣ Click “Create” and note the account URI, which you’ll need later.
Step 3: Assign Specific IAM Roles #
To ensure proper access control within Azure Trusted Signing, it’s essential to assign specific roles to your Azure user account. This process involves two main steps:
1️⃣ Assign the “Trusted Signing Identity Verifier” Role to Your Azure User Account
This role grants your Azure user account the necessary permissions to manage identity validation requests. Even if you’re the administrator, assigning this role is required.
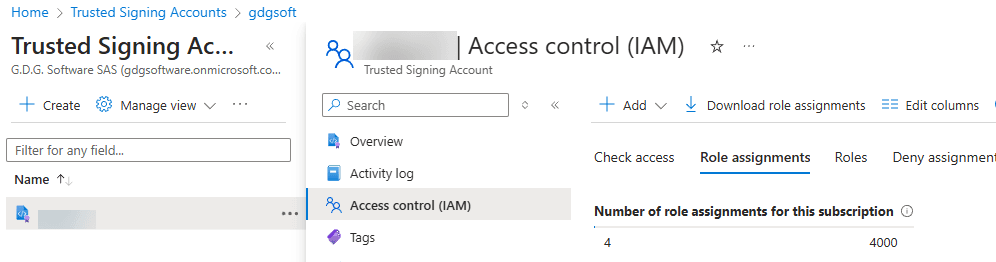
- Navigate to your new Trusted Signing account in the Azure portal.
- Click on Access Control (IAM).
- Select Add > Add role assignment.
- Search for and select the Trusted Signing Identity Verifier role.
- Proceed through the wizard to assign this role to your Azure user account.
2️⃣ Assign the “Trusted Signing Certificate Profile Signer” Role to Your Application’s Service Principal
This role allows your application to sign code using the Trusted Signing service.
Do the same steps as above, but choose the Trusted Signing Certificate Profile Signer role this time.
📖 Full details on setting up your account: 👉 Microsoft Trusted Signing Quickstart
Step 4: Validate Your Identity #
1️⃣ Navigate to Identity Validations in your Trusted Signing Account:
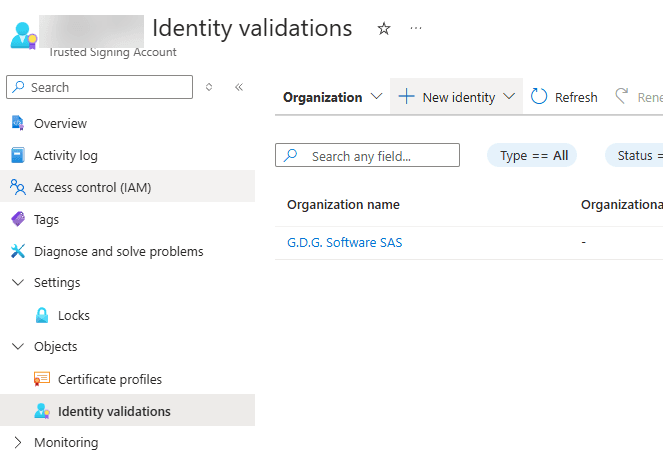
2️⃣ Choose “Organization” or “Individual” depending on your situation.
3️⃣ Click New Identity > Public, then:
- Provide your business details and supporting documents.
- Submit the request and wait for Microsoft verification (this can take a few hours to days, depending on whether the automated process fails or not).
📖 More on identity verification: 👉 Microsoft Identity Validation
Step 5: Create a Certificate Profile #
1️⃣ Once your identity is validated, go to Certificate Profiles.
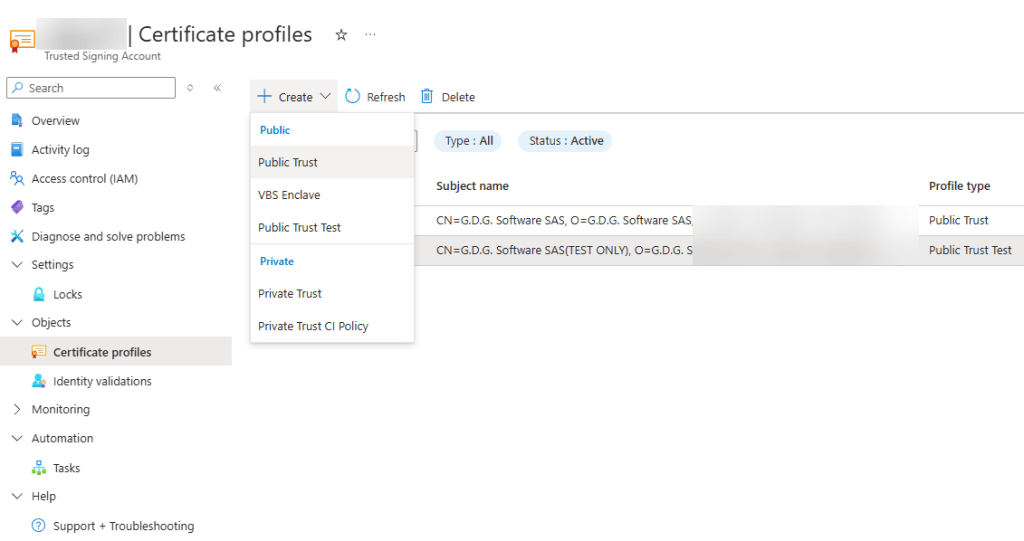
2️⃣ Click “Create”, then “Public Trust“:
- Select your identity in Verified CN, O.
- Choose the type of code signing certificate needed.
3️⃣ Save the certificate profile name for later use.
📖 Full guide on creating certificate profiles: 👉 Microsoft Certificate Profiles
🎉 You’re done!
Conclusion: Using The Azure Trusted Signing Service #
👉 Now you can sign your executable files with SignTool or our various tool software. For each of our software products, we are working on integrating this feature in future updates. It is already available for our installer and self-extracting archive generator, Paquet Builder.
We have even written a tutorial that explains how to use Azure Trusted Signing now that the service is ready. Feel free to continue reading by checking it out.